Fun Steps on How to Make a Rubber Band Ball at Home
Making a rubber band ball is a fun and engaging activity that can be enjoyed by people of all ages. By following these step-by-step instructions, you can create your own rubber band ball at home.
Key Takeaways:
- Creating a rubber band ball is a fun and creative DIY project.
- All you need is a large bag of rubber bands and some scrap paper.
- Start by folding a thick rubber band to create the core of the ball.
- Wrap rubber bands tightly around the core to build the ball’s size.
- Test the bounce and size of your rubber band ball as you go along.
Materials Needed for Making a Rubber Band Ball
Before you begin creating your rubber band ball, it’s essential to gather all the necessary materials. You’ll need a large bag of rubber bands and some scrap paper. The rubber bands will be the main component of the ball, while the scrap paper will help create the core. Having these materials on hand will ensure a smooth and enjoyable rubber band ball-making process.
Gathering the Materials
When selecting rubber bands for your ball, opt for a variety of sizes and colors to add visual interest to your creation. Choose rubber bands that are durable and elastic, as these will allow your ball to bounce and hold its shape well. It’s also a good idea to have a mix of thick and thin rubber bands to provide stability and flexibility to your ball.
As for the scrap paper, any type will do. You can use newspaper, tissue paper, or even old receipts. The paper will be used to create the core of the ball, which will act as the foundation for wrapping the rubber bands. Make sure to have enough paper available to create a compact core that can hold the rubber bands securely.
| Materials Needed: | Quantity |
|---|---|
| Rubber Bands | A large bag |
| Scrap Paper | Enough to create a compact core |
Having these materials ready will set you up for success when making your rubber band ball. Once you have everything prepared, you can move on to the next section to learn how to create the core of the ball.
Creating the Core of the Rubber Band Ball
When making a rubber band ball, the first step is to create the core. This is the foundation upon which the ball will be built. To create the core, you will need a thick rubber band, such as the ones used to secure vegetables. Start by folding the rubber band multiple times to create a flat “stack” of rubber. This will provide stability to the ball and prevent it from collapsing.
Once you have the folded rubber band stack, take a thinner rubber band and wrap it tightly around the thicker one. Twist the thinner band and wrap it in the opposite direction, creating a cross pattern. Repeat this process, adding more thin rubber bands, until there is no more slack in the bands. This will ensure that the core is sturdy and will allow for easy wrapping of additional rubber bands.
Creating the core of the rubber band ball is an essential step that sets the foundation for the rest of the ball. By following these techniques, you can ensure that your rubber band ball is stable and ready to be expanded.
Table: Rubber Band Ball Core Creation Techniques
| Technique | Description |
|---|---|
| Stacking | Fold a thick rubber band multiple times to create a flat stack. Provides stability to the ball. |
| Wrapping | Take a thin rubber band and wrap it tightly around the stacked rubber band, creating a cross pattern. Repeat until there is no more slack. |
| Twisting | Twist the thin rubber bands as you wrap them around the stacked rubber band, ensuring a secure fit. |
Rubber Band Ball Ideas
Once you have created the core of your rubber band ball, it’s time to get creative and start experimenting with different wrapping techniques. Here are some fun ideas to make your rubber band ball unique:
1. Colorful Patterns
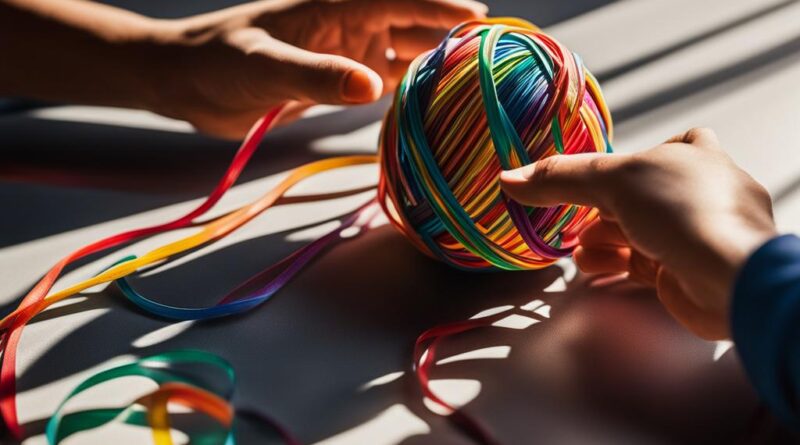
Use rubber bands of different colors to create eye-catching patterns on your rubber band ball. Try alternating colors, creating stripes, or even making a rainbow effect by wrapping bands of various colors around the ball.
2. Multilayered Ball
Create a multilayered rubber band ball by wrapping multiple layers of rubber bands around the core. Start with a layer of rubber bands in one color, then add a layer in a different color on top. Repeat this process with as many layers as you like, creating a visually interesting and textured ball.
3. Glow-in-the-Dark Ball
To make a cool and unique rubber band ball, use glow-in-the-dark rubber bands. These bands will give your ball a funky glow when the lights are off, adding a fun twist to your creation. You can find glow-in-the-dark rubber bands online or in craft stores.
“Get creative and have fun with your rubber band ball. The possibilities are endless, and you can let your imagination run wild. Don’t be afraid to try different techniques and explore new ideas to make your rubber band ball truly one-of-a-kind.”
Remember, the most important thing is to have fun while making your rubber band ball. Let your creativity shine and enjoy the process of creating a unique and bouncy toy. With these ideas, you’ll be able to take your rubber band ball to the next level!
| Rubber Band Ball Ideas | Description |
|---|---|
| Colorful Patterns | Use rubber bands of different colors to create eye-catching patterns on your rubber band ball. Try alternating colors, creating stripes, or even making a rainbow effect by wrapping bands of various colors around the ball. |
| Multilayered Ball | Create a multilayered rubber band ball by wrapping multiple layers of rubber bands around the core. Start with a layer of rubber bands in one color, then add a layer in a different color on top. Repeat this process with as many layers as you like, creating a visually interesting and textured ball. |
| Glow-in-the-Dark Ball | To make a cool and unique rubber band ball, use glow-in-the-dark rubber bands. These bands will give your ball a funky glow when the lights are off, adding a fun twist to your creation. You can find glow-in-the-dark rubber bands online or in craft stores. |

Testing and Growing the Rubber Band Ball
Once you have wrapped several rubber bands around the core, your rubber band ball will start to take shape. It’s time to test its size and bounce to see if it meets your expectations. Toss the ball in the air or bounce it against a wall to gauge its bounce and elasticity. Is it the right size and weight for your liking? Does it have a satisfying bounce? These are important factors to consider when testing your rubber band ball.
If you are satisfied with the current size and bounce, you can stop adding more rubber bands and consider your rubber band ball complete. However, if you want to make your ball even larger, you can continue adding rubber bands until it reaches the desired size. Keep in mind that the larger the ball gets, the heavier it will become, so make sure you have enough space and a sturdy surface to support it.
Remember, making a rubber band ball is all about experimentation and personal preference. There are no right or wrong answers when it comes to size and bounce. It’s all about finding the right balance and creating a rubber band ball that brings you joy. So keep testing, adjusting, and growing your rubber band ball until it’s exactly what you want.
The Rubber Band Ball Size Chart
| Rubber Band Ball Size | Description |
|---|---|
| Small | A ball that fits comfortably in the palm of your hand. |
| Medium | A ball that is about the size of a tennis ball. |
| Large | A ball that is larger than a tennis ball, but still manageable. |
| Extra Large | A ball that is significantly larger than a tennis ball and may require two hands to hold. |
Use this rubber band ball size chart as a reference to determine your desired size. Remember, the size of your rubber band ball is entirely up to you, so feel free to get creative and go beyond the standard sizes.
Testing and growing your rubber band ball is an exciting process that allows you to see your creation come to life. Enjoy the journey and have fun experimenting with different sizes and bounces. Whether you choose a small, medium, large, or extra-large rubber band ball, the satisfaction of making something unique and bouncy will bring joy and entertainment for hours to come.
Making a Rubber Band Ball Without Extra Materials
If you’re looking for a challenge and want to make a rubber band ball without any extra materials, there’s a technique you can try. Instead of using a thick rubber band as the core, you can start by crumpling a piece of paper into a tight ball. This paper ball will serve as the center of your rubber band ball.
Begin by wrapping rubber bands around the paper ball, making sure to secure them tightly. You can start with a few rubber bands and gradually add more as you go. The key is to find rubber bands that are the right size to ensure a tight fit without any slack.
This technique allows you to create a rubber band ball using only two materials – paper and rubber bands. It’s a great option if you don’t have access to a thick rubber band or if you want to experiment with different materials. Just make sure to wrap the rubber bands tightly, and you’ll have a unique rubber band ball in no time.

| Technique | Materials | Difficulty |
|---|---|---|
| Traditional Method | Thick rubber band, thin rubber bands | Easy |
| Paper Core Method | Paper, rubber bands | Intermediate |
| No Extra Materials Method | Only rubber bands | Difficult |
As shown in the table, the traditional method is the easiest, requiring both thick and thin rubber bands. The paper core method, which we discussed earlier, is slightly more challenging but still achievable with basic materials. Lastly, the no extra materials method is the most difficult but can be a rewarding and unique way to create a rubber band ball.
Tips for Success:
- Ensure the paper ball is tightly crumpled to provide a sturdy core for the rubber bands.
- Choose rubber bands of similar sizes to maintain consistency in the ball’s structure.
- Wrap the rubber bands tightly around the paper ball to prevent them from slipping or becoming loose.
- Experiment with different colors and sizes of rubber bands to create a visually appealing rubber band ball.
Creating a Massive Rubber Band Ball
If you’re looking to take your rubber band ball to the next level, why not try creating a massive one? While there is no limit to how large you can make your rubber band ball, it’s important to consider the practicality and safety of such a project. Keep in mind that as the ball grows in size, it will become extremely heavy and may pose a risk of breaking items around it. Safety goggles should be worn once the ball reaches the size of a basketball, as rubber bands may start snapping.
If you’re up for the challenge, you can even aim to beat the world record for the largest rubber band ball. The current world record stands at over 700,000 rubber bands! Just imagine the time and dedication it would take to create such a massive ball.
While creating a massive rubber band ball may require a significant amount of resources and time, it can be a rewarding and impressive project. Just remember to take the necessary safety precautions and have fun with your creation.
Table: World Record for Largest Rubber Band Ball
| Year | Size | Number of Rubber Bands |
|---|---|---|
| 2019 | 6 feet 7 inches | 700,000+ |
| 2015 | 5 feet 6 inches | 420,000 |
| 2012 | 4 feet 9 inches | 175,000 |
Rubber Band Ball Techniques
Creating a rubber band ball is not only a fun activity but also an opportunity to explore different techniques and approaches. Here are some exciting rubber band ball techniques to try:
1. Colorful Spiral Design
Add an artistic twist to your rubber band ball by creating a colorful spiral design. Start by selecting rubber bands of various colors. Wrap each rubber band around the core, making sure to overlap and twist them as you go. This technique will result in a visually stunning rubber band ball with vibrant hues spiraling around its surface.
2. Mixed Texture Ball
If you want to add some texture to your rubber band ball, consider incorporating different types of rubber bands. Mix and match regular rubber bands with thicker ones or even silicone bands to create a unique tactile experience. Not only will this make your rubber band ball more interesting to touch, but it will also provide a visually appealing contrast.
Experiment with different techniques to personalize your rubber band ball and create a one-of-a-kind masterpiece.
3. Glow-in-the-Dark Ball
For an added element of excitement, create a rubber band ball that glows in the dark. Purchase glow-in-the-dark rubber bands and wrap them around the core of your ball. Charge the rubber band ball under bright light, and then turn off the lights to see it illuminate. This technique is perfect for parties or as a fascinating addition to your collection.
Remember, the possibilities for creating unique rubber band balls are endless. Don’t be afraid to experiment with different techniques, colors, and textures to personalize your creation and make it truly one-of-a-kind.

Conclusion
Creating your own rubber band ball is a fun and engaging DIY activity that can be enjoyed by people of all ages. By following the step-by-step instructions and using just a few materials, you can make your very own bouncy toy at home. Whether you choose the traditional method or experiment with alternative techniques, the possibilities are endless.
Take the time to explore different sizes, colors, and wrapping techniques to personalize your rubber band ball. It’s a great way to spend some quality time and unleash your creativity. Plus, the satisfaction of seeing your ball grow and testing its bounce is truly rewarding.
So why not get started on your own rubber band ball today? Gather your materials, follow the instructions, and enjoy the process of creating a unique toy that will provide hours of entertainment. Get ready to have some fun and watch your rubber band ball come to life!
FAQ
What materials do I need to make a rubber band ball?
You will need a large bag of rubber bands and some scrap paper.
How do I create the core of the rubber band ball?
Start by folding a thick rubber band multiple times to create a flat “stack” of rubber. Wrap a thinner rubber band around the thicker one, twisting it and wrapping it over in the other direction. Repeat this process until there is no more slack in the thin band.
How do I wrap rubber bands around the core?
Begin with two rubber bands placed in a criss-cross shape over the core. Make sure they’re tightly secured by twisting and wrapping them around the core a few times. Continue to add more rubber bands, spacing them evenly to ensure that the ball grows evenly and does not become lopsided.
How can I test the size and bounce of my rubber band ball?
Test its bounce by tossing it in the air or bouncing it against a wall. If you’re satisfied with the size, you can stop adding more rubber bands. However, if you want a larger ball, continue adding rubber bands until it reaches the desired size.
Can I make a rubber band ball without using extra materials?
Yes, you can. Instead of folding a thick rubber band to create the core, start by crumpling a piece of paper into a tight ball. Wrap rubber bands around this paper ball to create the rubber band ball.
How big can a rubber band ball be?
Rubber band balls can be made as large as possible, but keep in mind that they will become extremely heavy and may risk breaking something. The world record for the largest rubber band ball requires over 700,000 rubber bands.
Can I cut the rubber band ball in half?
Yes, once you have created a rubber band ball, you can cut it in half to observe the unique patterns created by the intertwining rubber bands. However, be aware that colorful rubber bands will fade over time.
Can I personalize my rubber band ball?
Yes, you can experiment with different sizes, colors, and techniques to personalize your rubber band ball.
Is making a rubber band ball a fun activity to do at home?
Absolutely! Making a rubber band ball is an enjoyable and creative activity that can be done at home with just a few materials. It’s a great way to pass the time and create a unique and bouncy toy.